DIY Craft Cave
Create a craft cave using spare furniture, cardboard boxes and contact paper.
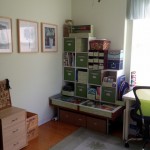
There came a time when Krista said, “Aaaarrrgh! I have craft stuff all over the house! We have to organize and consolidate!” And so it began…
First, we made a list of furniture that was somewhere else in the house, not being utilized to its fullest. Here’s what we ended up with:
- A white Ikea table that had been disassembled, currently stored under the guest room bed
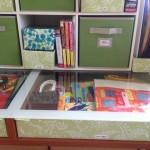
- A coffee table that had been removed from the living room because of sharp corners and a glass top (active child in house!). The bonus of this table is that under the glass there is a shelf which extends over the entire table.
- Two small Ikea file cabinets that held all kinds of junk in the upstairs office
- A tall skinny cabinet from the living room that actually interfered with maximum TV viewing
- a 9-cubby wooden wine rack that had been removed from a new piece of furniture – a more useful basket took its place
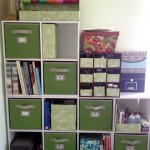
We also ended up buying two inexpensive new pieces: an 8-cubby unit and a 4-cubby unit, from Home Depot.
Then Krista made a list of all the craft stuff she had and put it into categories: her son’s paper activities, cake decorating, gift wrapping, gardening, sewing, cross stitching, writing supplies (paper,pens, pencils, scissors, glue, tape). Then we started looking at the size of the items, and the quantity of each so that we could decide what kind of container was best suited for each.
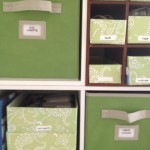
Next came rummaging through the boxes at Costco, and bringing home the sizes we thought we needed. (This involved a few trips because eyeballing size is not an exact art.) As we started organizing the boxes in the cubbies and around the furniture, we decided we needed another unifying piece, and that was six fabric storage boxes, again from Home Depot.
We began with the easy stuff – gift bags were going under the glass of the coffee table. But they slid all over the place in there, so we cut two open-top boxes from the purchased cubby boxes so that they would fit into those shelves, and we could still see the contents. Target had a perfectly-matching contact paper that we used to cover any exposed cardboard box surfaces. Then a tall slim box was covered to house the rolled gift wrap. This box was slid between the work table and the coffee table. Three large boxes below the coffee table were filled with tissue paper, fabric tote bags and Christmas wrap. We left those plain brown, as they blended with the table above them. To finish up the gift wrap category, another box was fashioned to accommodate rolled ribbon on a rod, and loose bows and ribbons in a tray found below.
The wine cubby came next – again with the Costco boxes. We found duplicate boxes of certain food items, trying to make the “drawers” as similar in size as we could. These were perfect for scissors, tapes, rulers, …..
Cake decorating supplies were divided into three groups – trays and platters, supplies for classes, and supplies used at home. The trays were fitted into a covered box that fit perfectly between gift wrap box and large cubbies. The other items were placed in boxes near the trays, along with a cake pop display box and books on baking/decorating topics.


