Fleece Neckwarmers
In case you haven’t seen it on the news… we’ve been under a deep freeze here in Buffalo this winter! We NEED things to keep us warm!
Our last two winters have been so mild, I think we’d forgotten how cold winter can be here. Two of my friends have birthdays now, so naturally I thought, what can I make to help them stay warm.
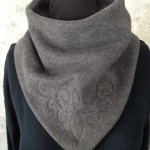
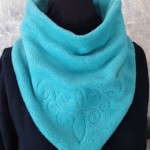
A few years back, I made my NYC niece, Helen, a couple of fleece neckwarmers, so I pulled out my original pattern. One had fringe along the bottom, and the other was made in a peacock feather-like print. I had spent some time designing the basic shape of the neckwarmer, because I wasn’t particularly happy with the plain old rectangular tubes they sell in the ski shops. Instead, I went with a curvey L shape that included a longer point for the front, to fill in the opening at the top of coats and jackets.
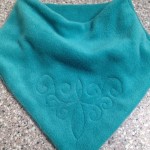
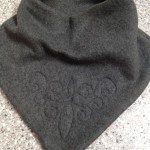
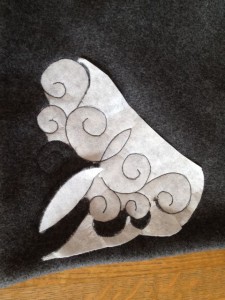
I made an addition to my original design, in that I stitched a little flourish on the point, which adds some femininity to an otherwise plain piece of fleece. I looked over various quilting designs for the corners of quilts, and came up with a cross between a fleur-de-lis and some curly-qs.
First I stitched the two pieces of fleece, right sides together, along the top and bottom edges, and turned it right side out. To add the flourish on the point, I drew my quilting design onto a triangle of Stitch and Tear, and then pinned it onto the front of the neckwarmer. I then used a very short straight-stitch on my sewing machine to trace over the design. It took a bit of time and patience, but not ridiculous. All that remained was to rip off the Stitch and Tear.
In case you think I have a fancy-schmantsy sewing machine, I do not. For this project, I used my late mother-in-law’s circa 1950s Sears sewing machine. I have found her machine to do a better job than any other I’ve seen for quilting and even stitching of thicker fabrics without shifting. Thanks, Mom!
The final step was to finish the neck seam. Right sides together, I sewed over the top edge seams, over the front, and over the bottom edge seams. The remainder of the neck seam was finished by hand.
I was pleased with the finished products, and I think my buddies look warm and, more importantly, stylin’!
